

Inkipedia
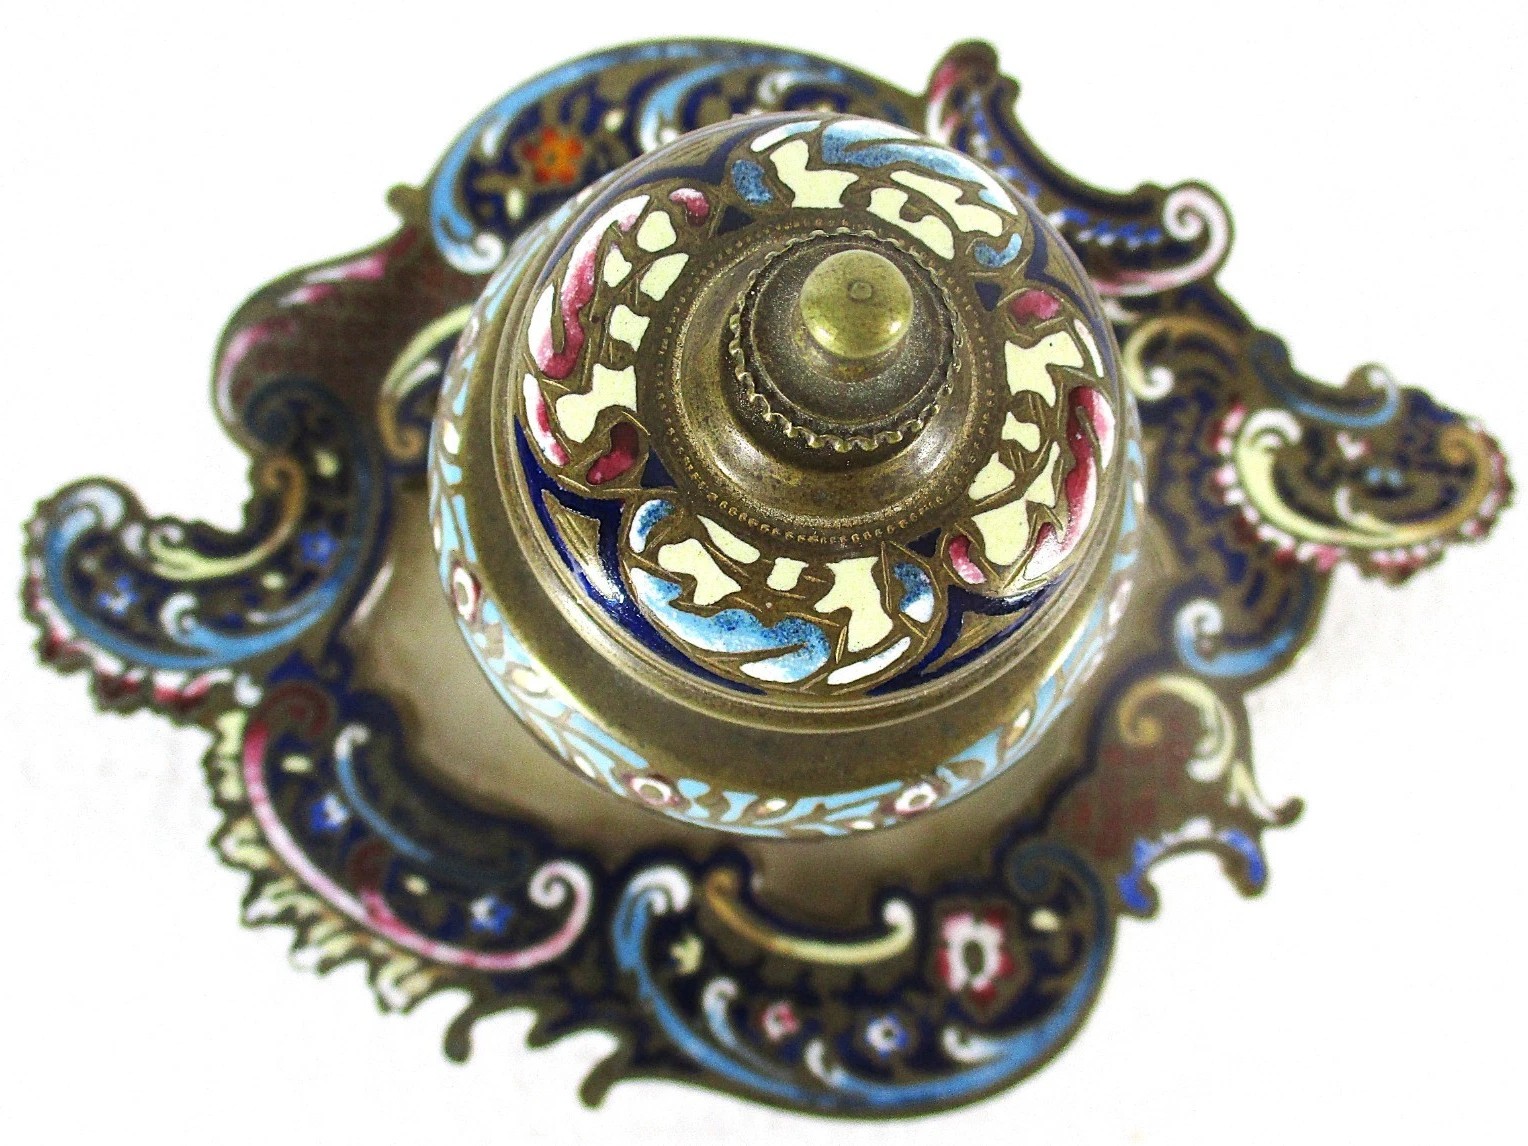
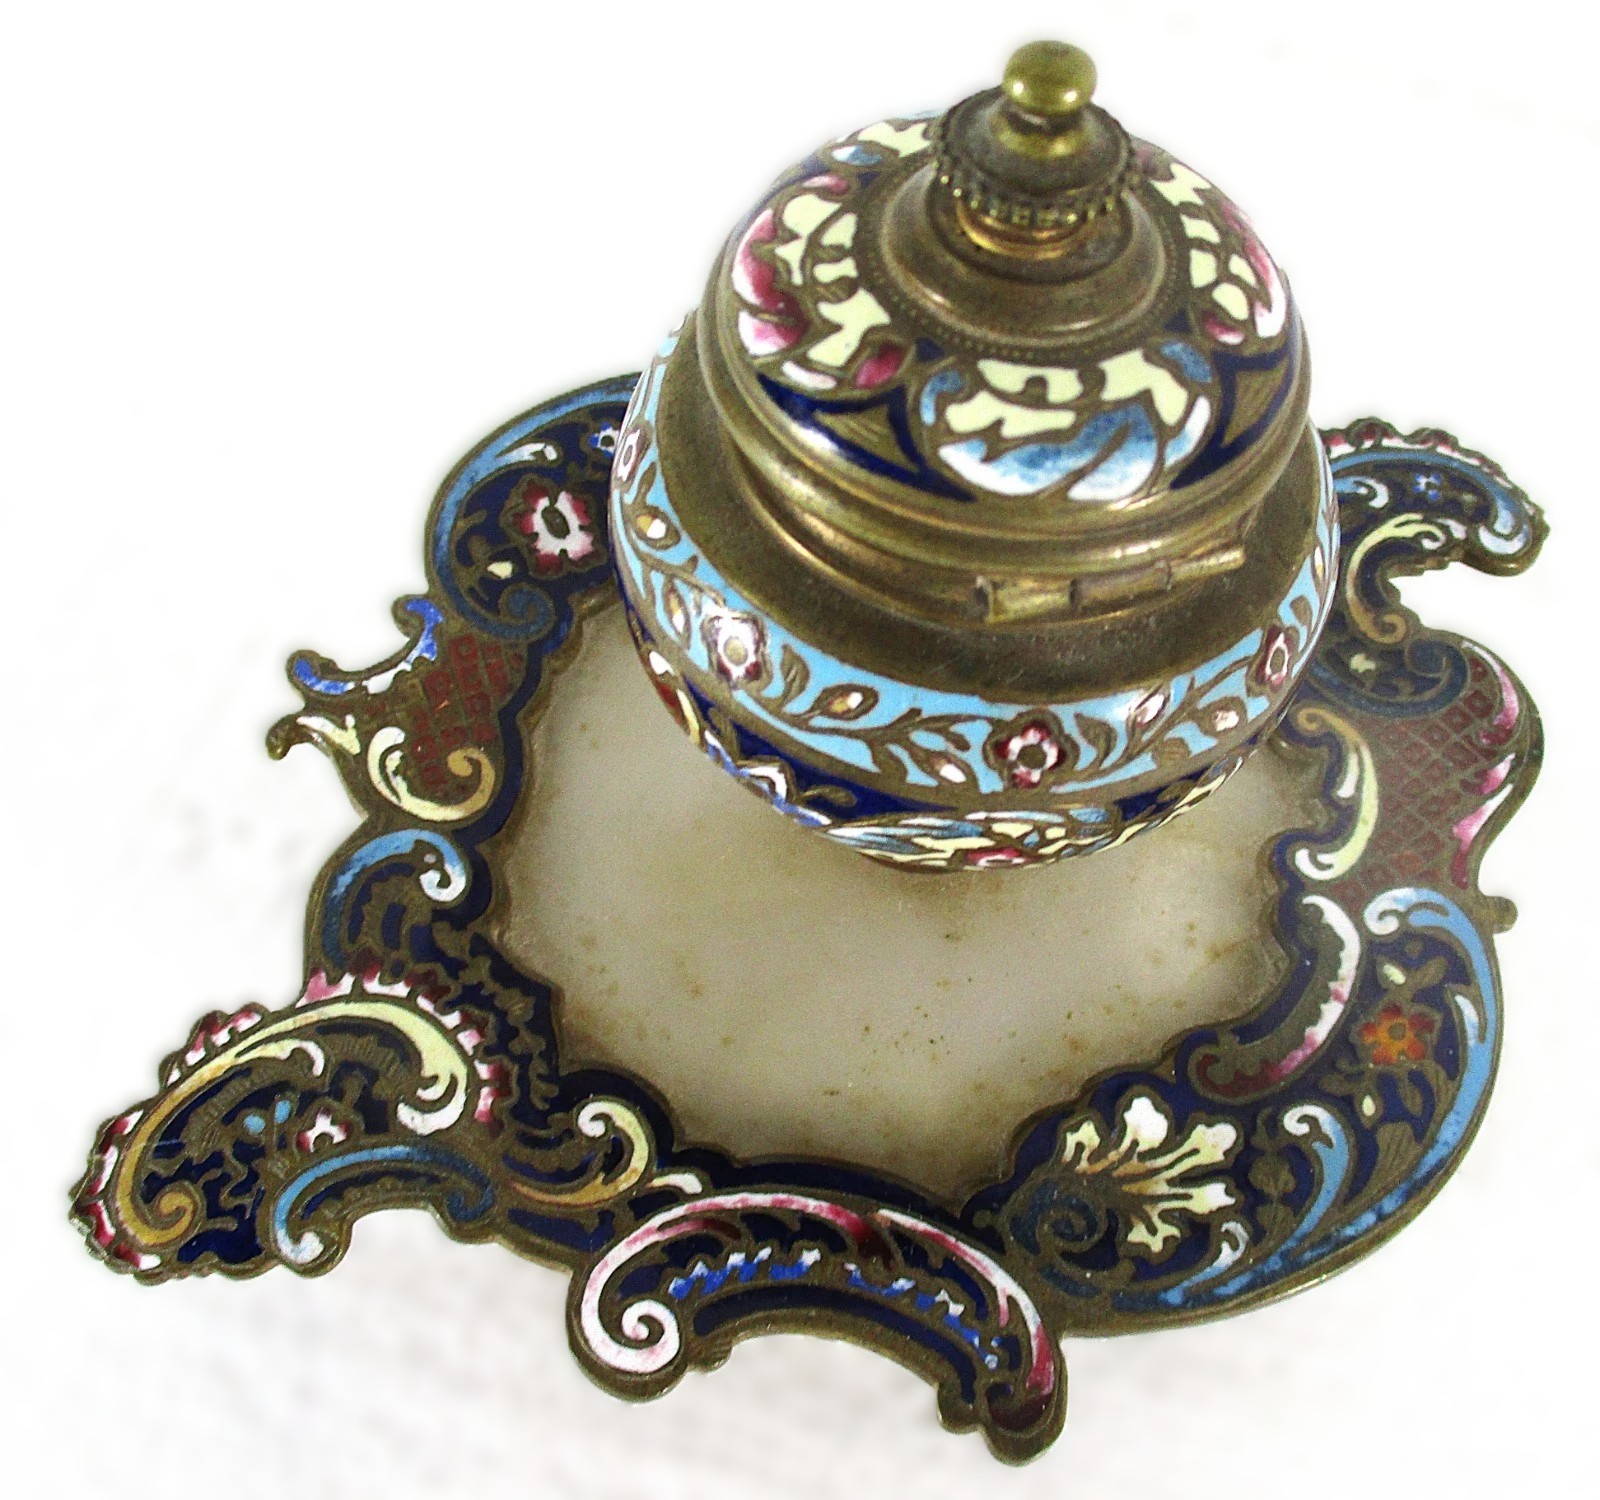
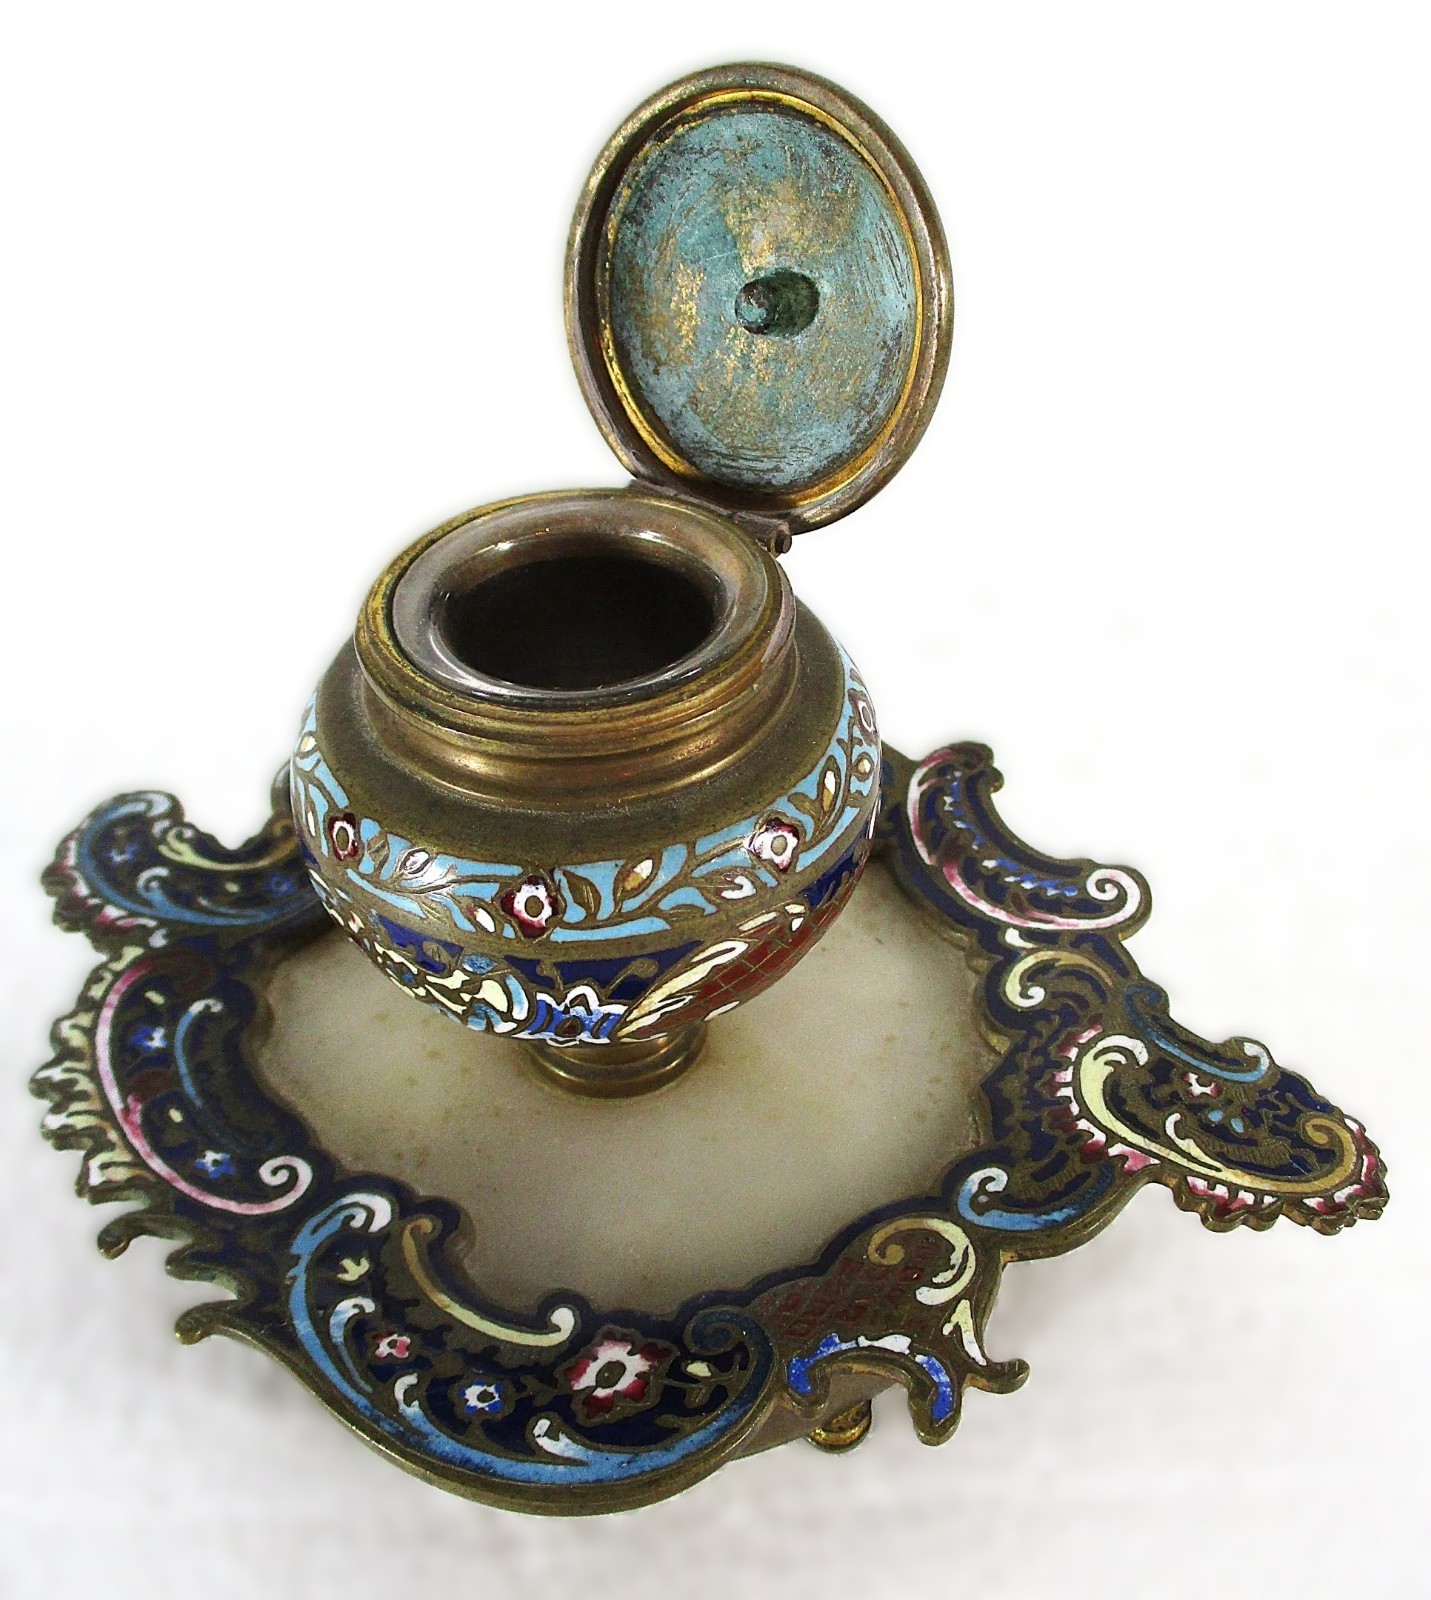
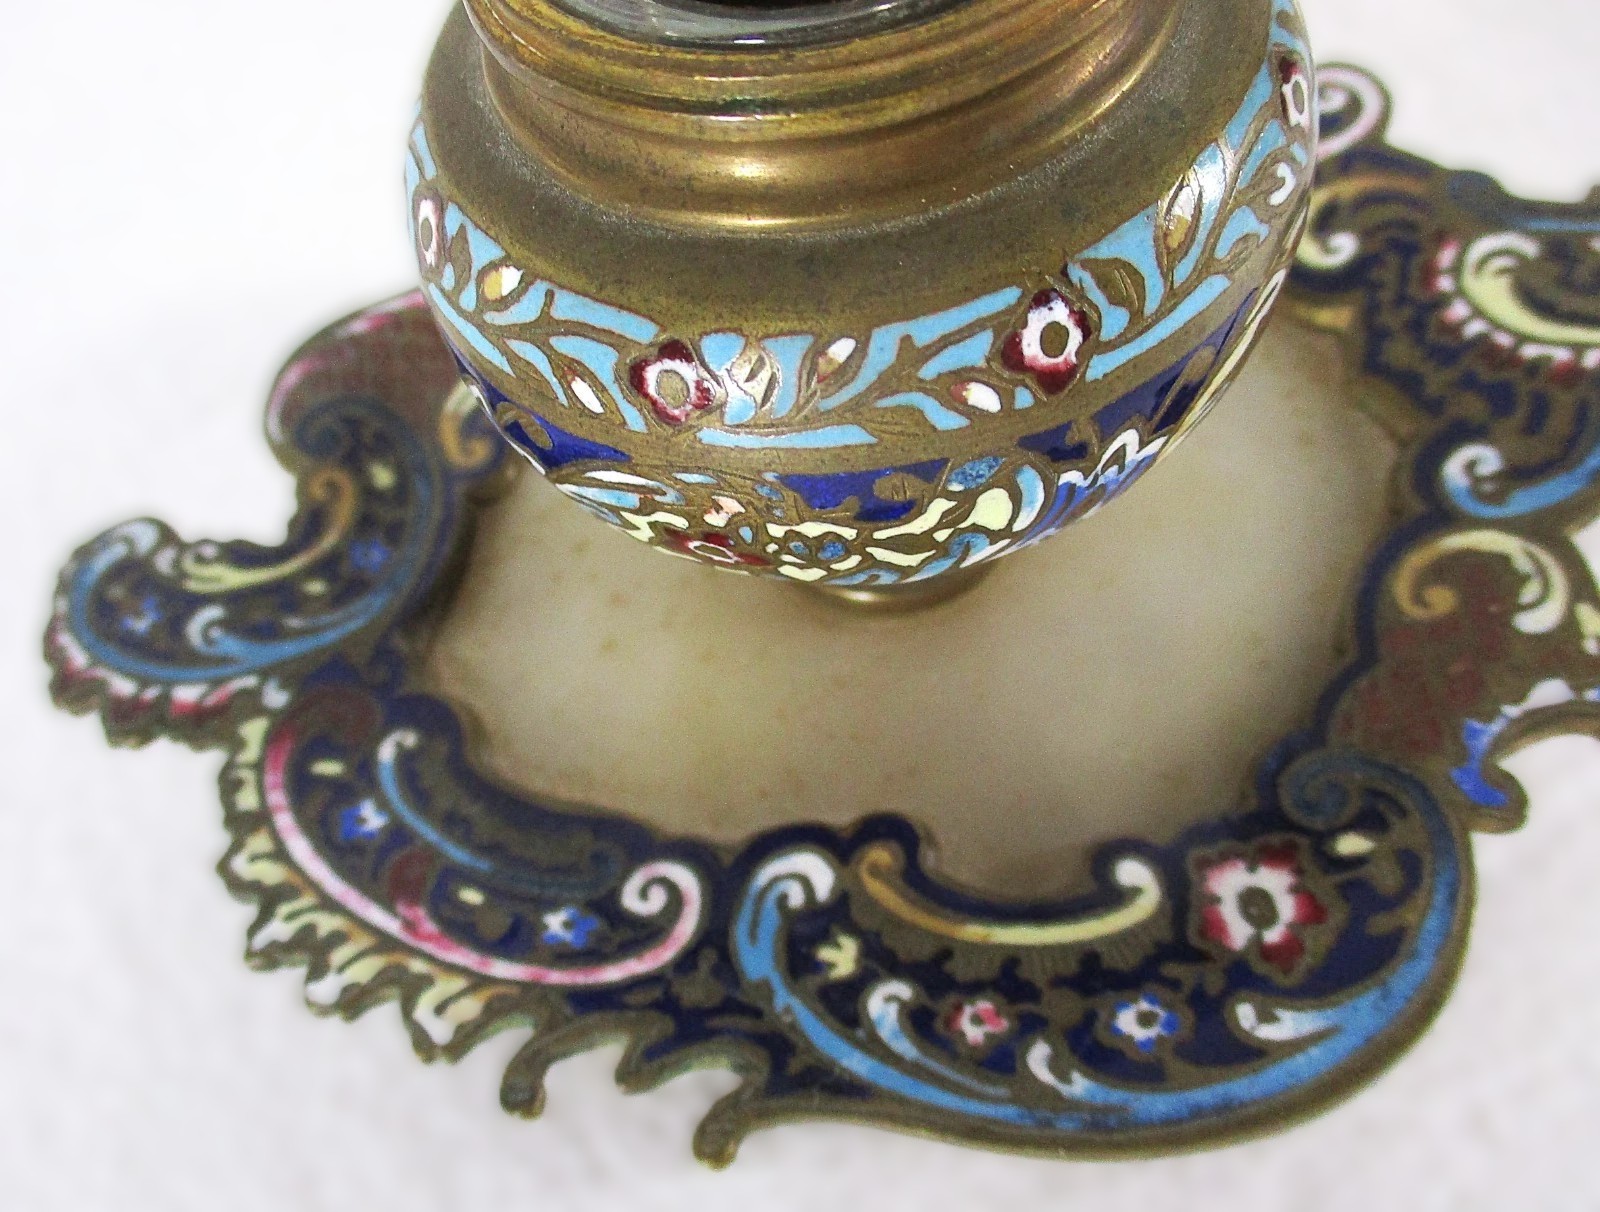
Champlevé Enamel Inkstand
| Categories | Enameled Metal |
| Type | Champlevé |
| Material | Enameled Brass/Bronze/Metal |
| Markings | Unmarked |
| Manufacturer | Undetermined |
| Origin | France |
| Date or Era | circa 1890 |
| Measuring | 6” x 4 ½” x 4” high |
Description
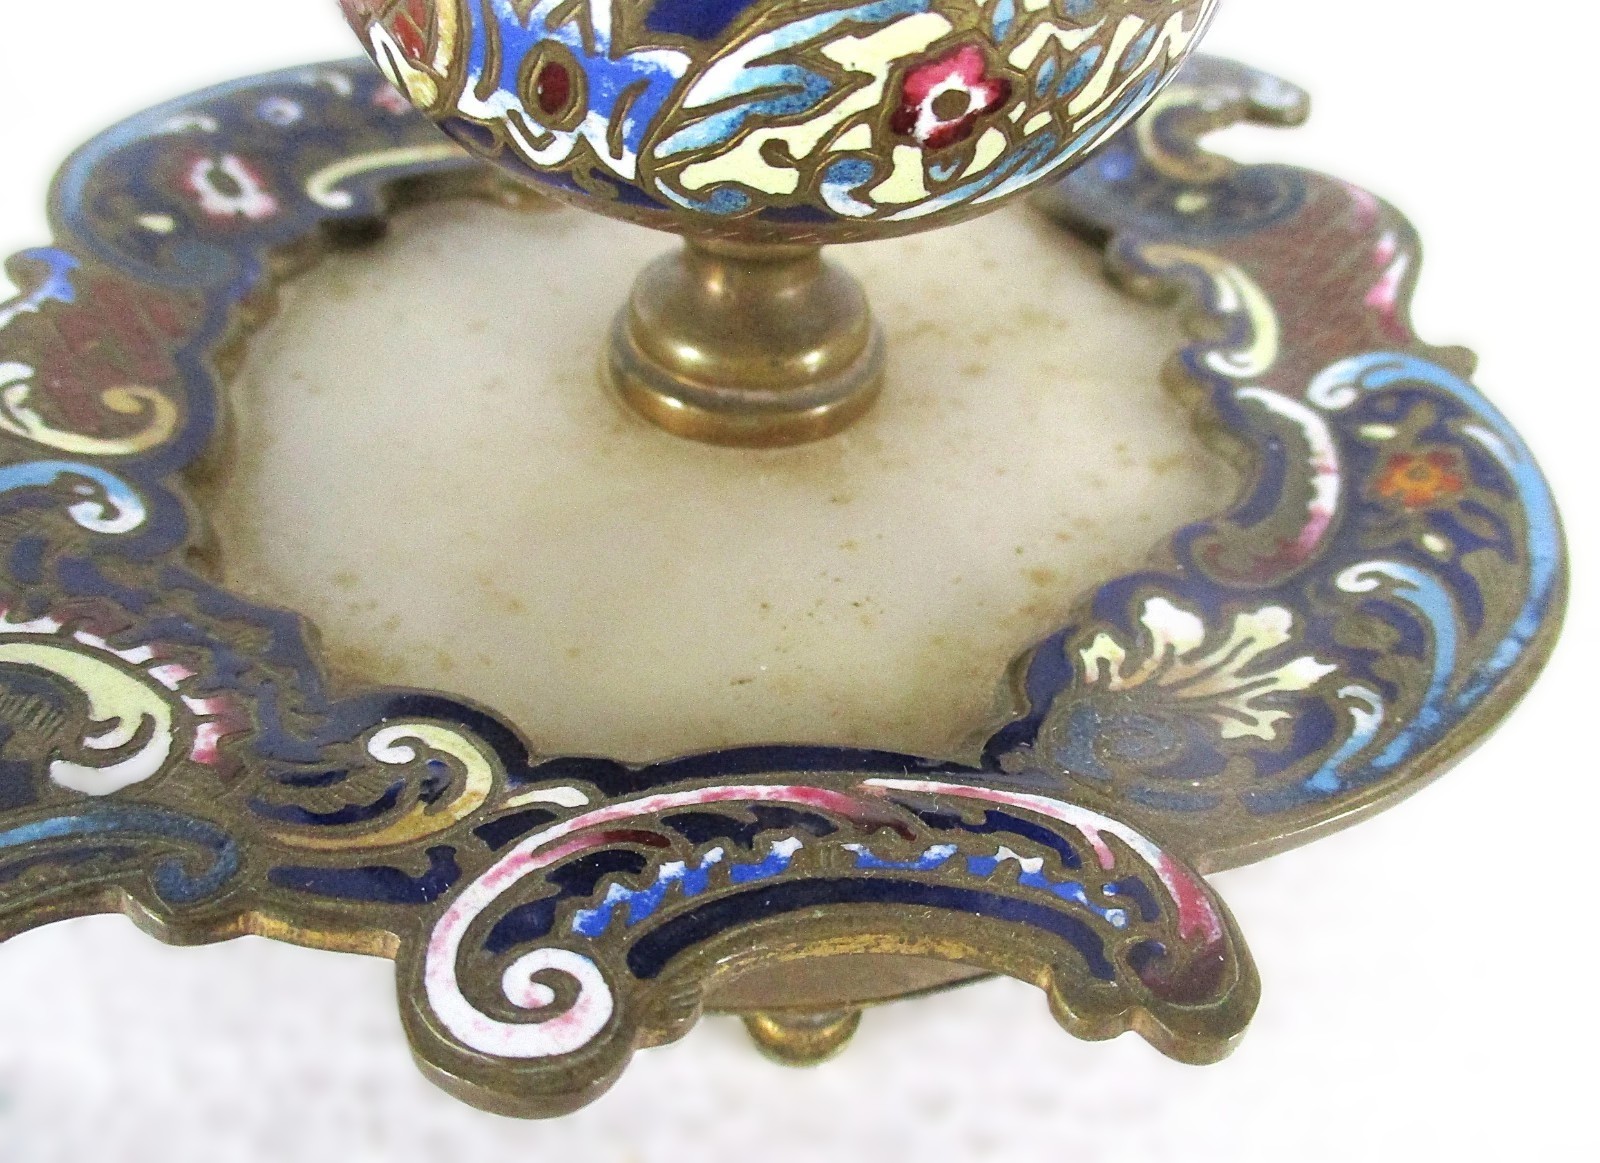
- Structure & Form: The piece features a central, urn-shaped inkwell reservoir with a domed, hinged lid, elevated on a short pedestal foot. It is mounted onto a smooth, polished slab of light-colored stone — white onyx.
- The Border: The stone base is framed by an ornate, asymmetrical cast-brass border featuring Rococo-revival openwork, sweeping scrolls, and stylized foliage.
- Enamel Palette: The champlevé enameling decorates the lid, the body of the inkwell, and the outer scrolling frame. The color scheme relies heavily on a vibrant cobalt blue background, accented by sky blue, opaque cream/white, and touches of deep red or pink to form intricate floral bands and vines.
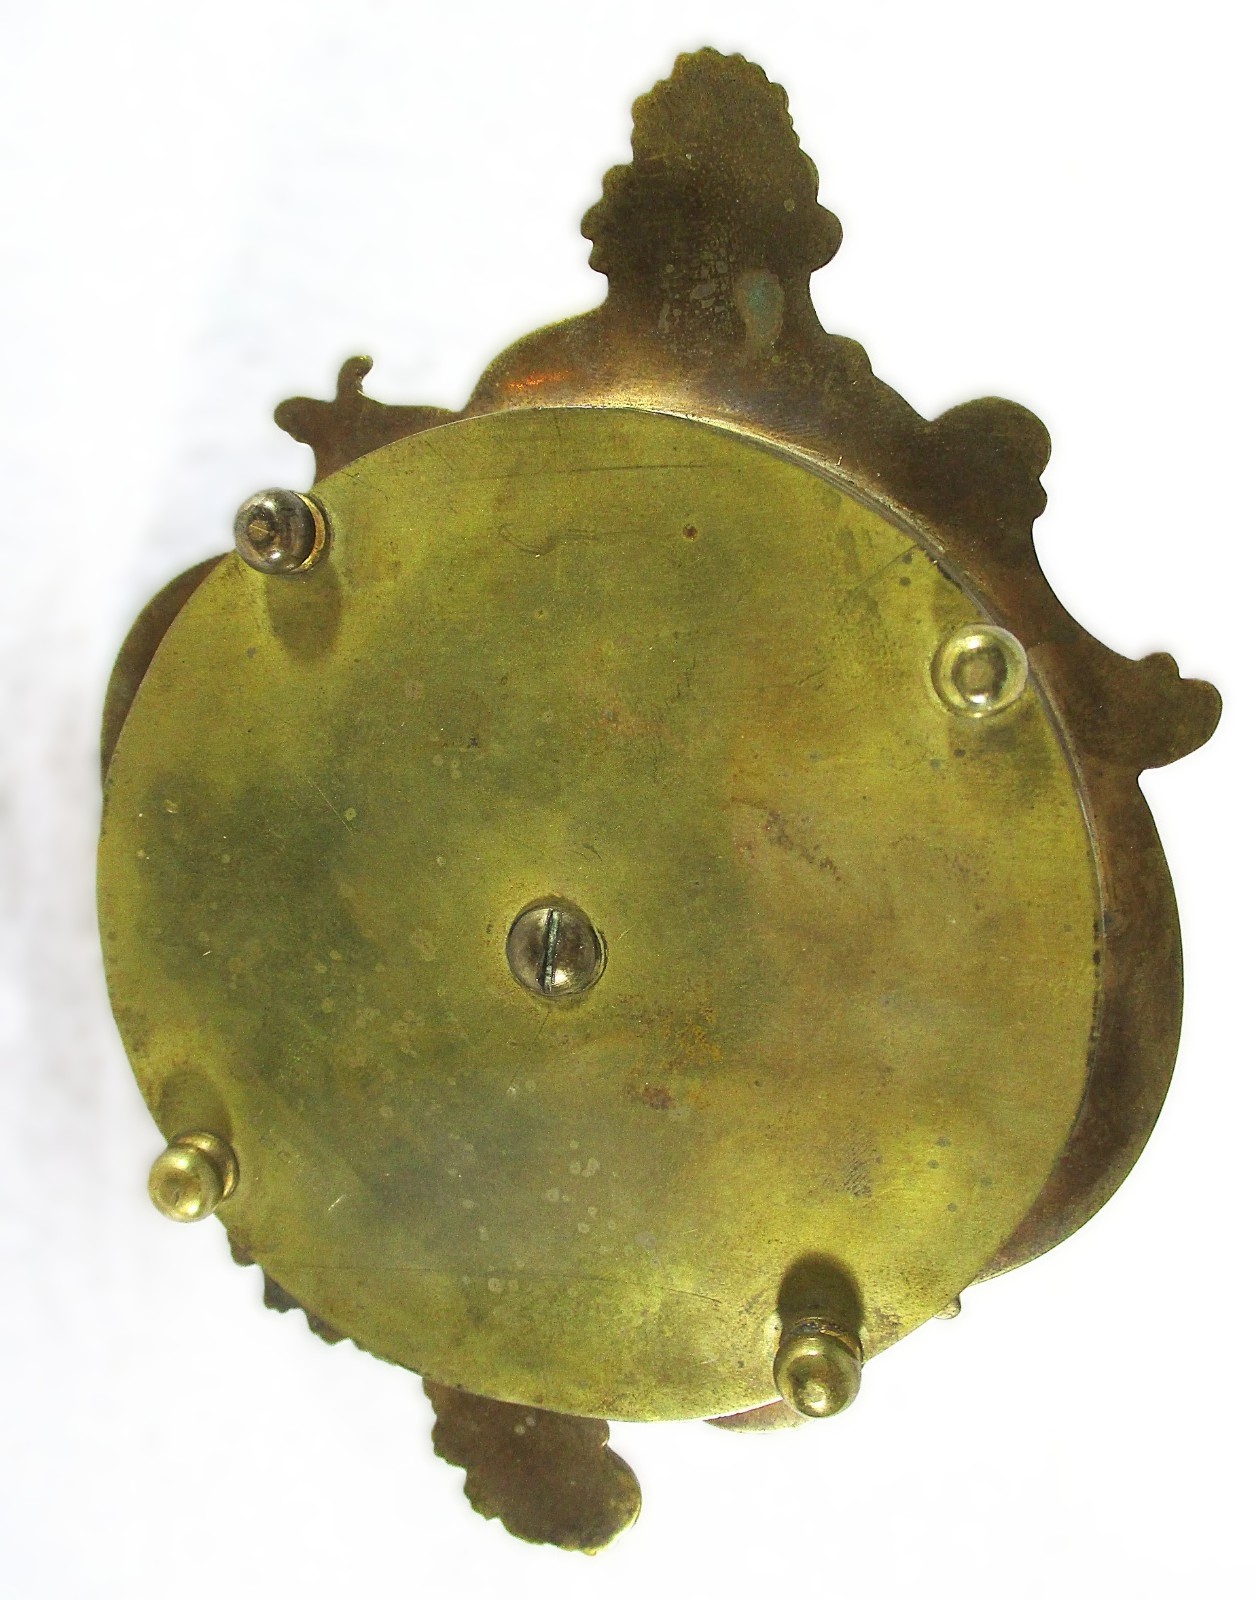
- Underside: The bottom reveals a solid brass backing plate secured by a heavy central screw that holds the assembly together, all resting on four small, turned bun feet.
Origin and Date
- Where It Was Made: France (most likely Paris). French workshops dominated the production of these specific multi-colored enamel and onyx desk sets.
- When It Was Made: Circa 1880–1900 (Late 19th Century). This style peaked during the Napoleon III and Belle Époque periods, when reviving Renaissance and Rococo aesthetics for high-end writing table accessories was fashionable.
The Manufacturing Process
Making a complex piece like this required a blend of metalsmithing, chemistry, and meticulous lapidary work:
- Casting the Metal Frame: Instead of hand-carving every single cell out of solid metal, late 19th-century artisans typically used sand-casting or the lost-wax method to cast the brass or bronze parts. The mold was designed so that the finished metal pieces emerged with the recessed cells (champs) already formed into the surface. A craftsman would then clean up the edges with engraving tools.
- Preparing the Enamel: Vitreous enamel—essentially finely powdered glass—was mixed with specific metallic oxides to create the different colors (e.g., cobalt for the deep blue, copper for the lighter blues). The powder was moistened with water or oil to form a workable paste.
- Filling and Firing (Multi-Stage): The artisan meticulously packed the paste into the tiny cast recesses using a fine spatula or brush. The piece was then placed into a high-temperature kiln (around 750°C to 850°C) until the glass melted and fused to the metal. Because glass shrinks as it melts, and because different colors often require different firing temperatures, the cells had to be filled and fired multiple times to ensure they were completely full.
- Grinding Flush: After the final firing, the enamel looked bumpy, uneven, and overspilled the boundaries. The craftsman used abrasive stones and water to grind the entire surface completely flat. This removed the excess overspill and brought the enamel perfectly flush with the brass borders, revealing the crisp, clean lines of the pattern.
- Gilding and Assembly: The exposed brass lines were polished and often acid-etched or electroplated with gold (gilding) to give them a bright finish that wouldn’t tarnish. Finally, the stonecutter shaped and polished the central onyx slab, and the entire piece was bolted together from underneath using the central screw assembly.
Sold for $139 in June 2026
Content disclaimer. The information posted is the owner’s best knowledge and may not have been vetted by the SOIC. We welcome comments, corrections, and additions, working to make our website information comprehensive and accurate.
Join the Society of Inkwell Collectors (SOIC) – it’s free!
Founded in 1981 as a non-profit organization,
we are documenting inkwells (and accessories).
We’re here to help and inform!